

Overview
This article covers the integration of GeoSpark Android SDK. GeoSpark Android SDK enables you to track your user location in both online and offline states. The SDK enables you to track location in foreground, background and terminated app state. Our SDK tracks location with minimal battery drain.
Here are the steps involved in integrating GeoSpark's Android SDK with your app:
Step 1: Install SDK
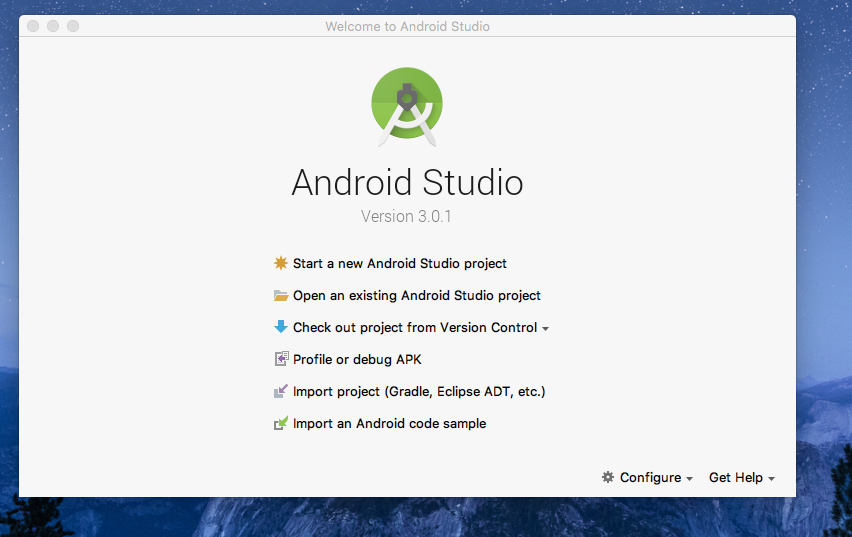
Open Android Studio, start a new Android Studio project and create project.
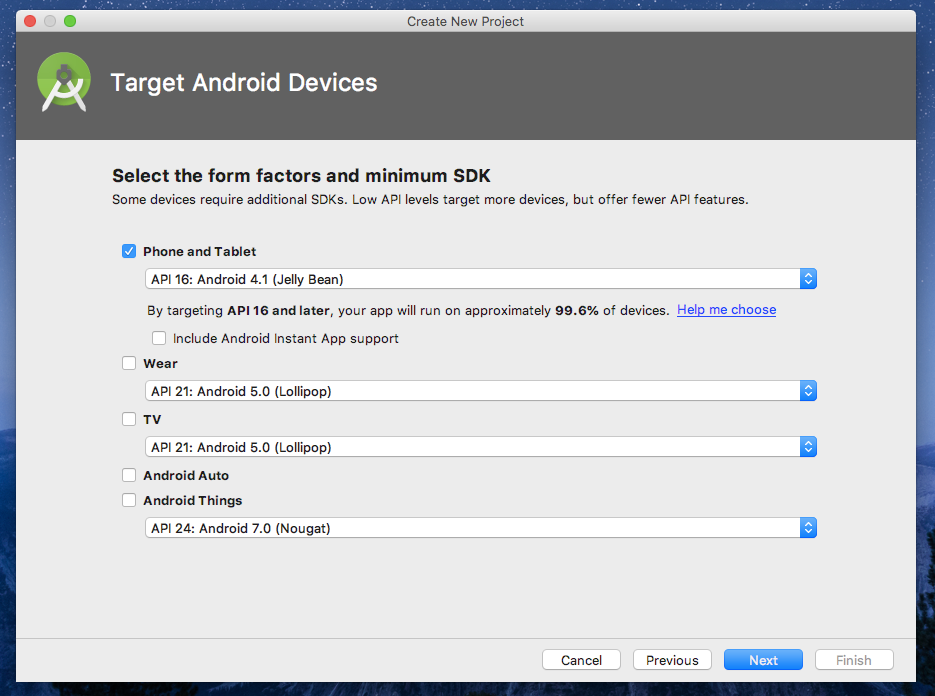
Select minimum SDK Android 4.1.
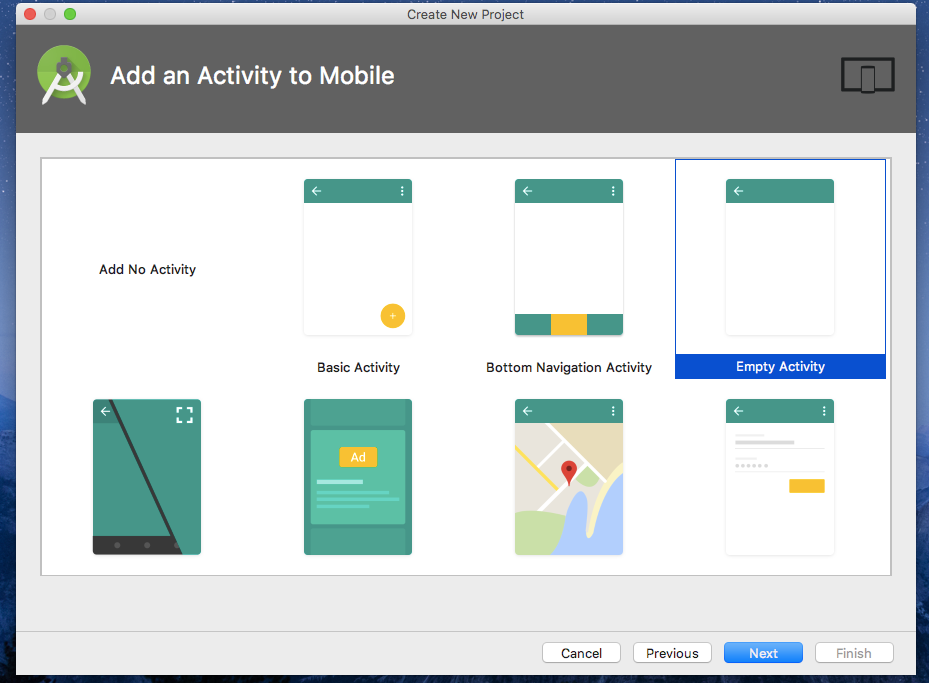
Select Empty Activity and finish.
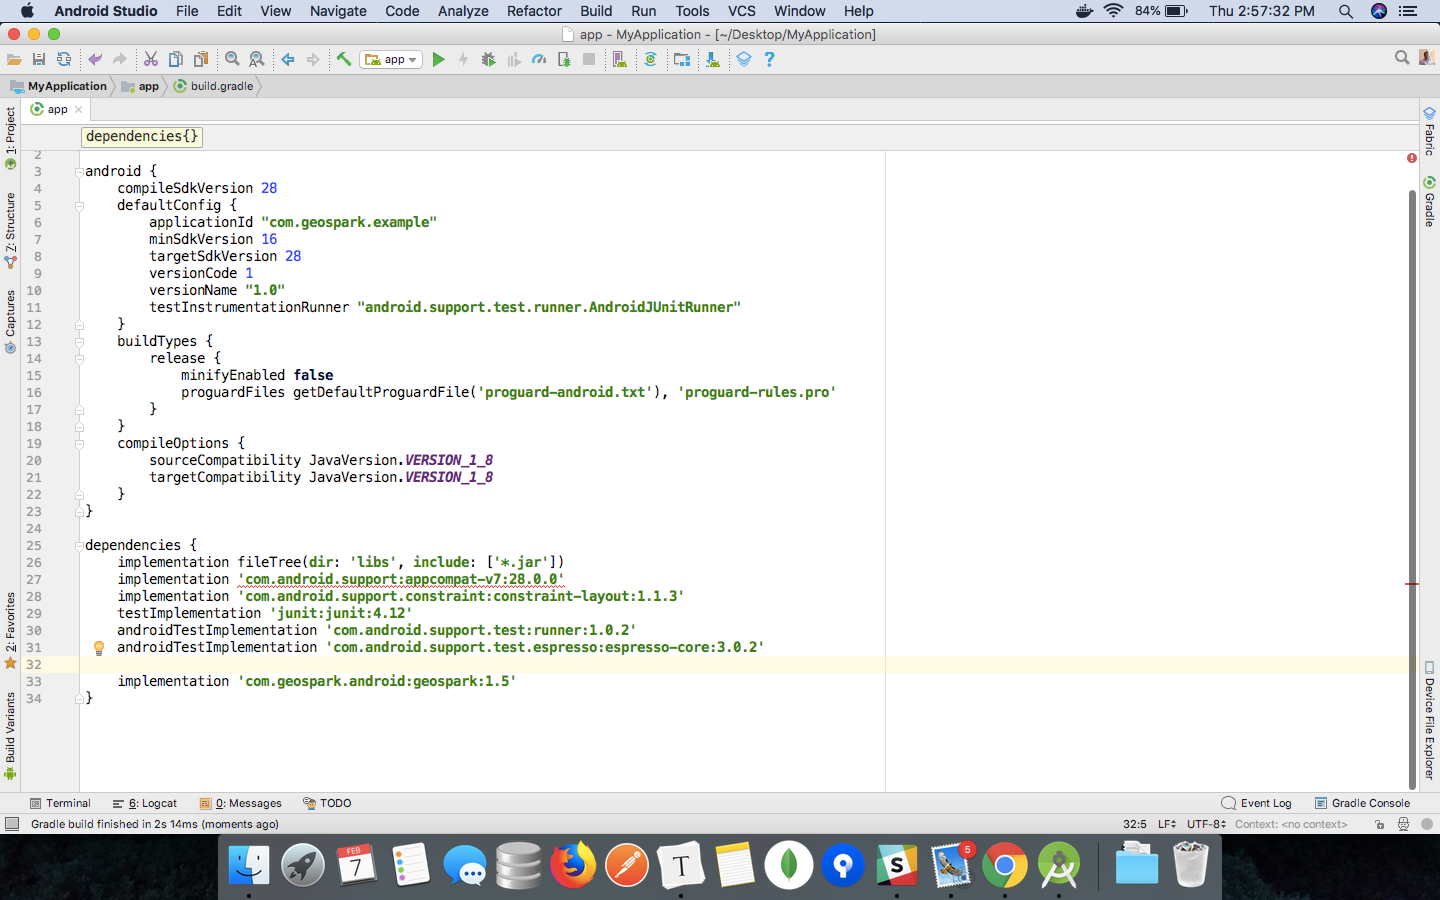
Install the SDK to your project via Gradle in Android Studio and add the dependencies below in your app build.gradle file.
Step 2: Set DeviceToken
Set FCM DeviceToken to create a user. If you haven't set FCM DeviceToken already, then add Firebase to your Android project.
Step 3: Initialize SDK
Sign up here to create an account with GeoSpark. Post signup, you can create your first project from the dashboard screen.
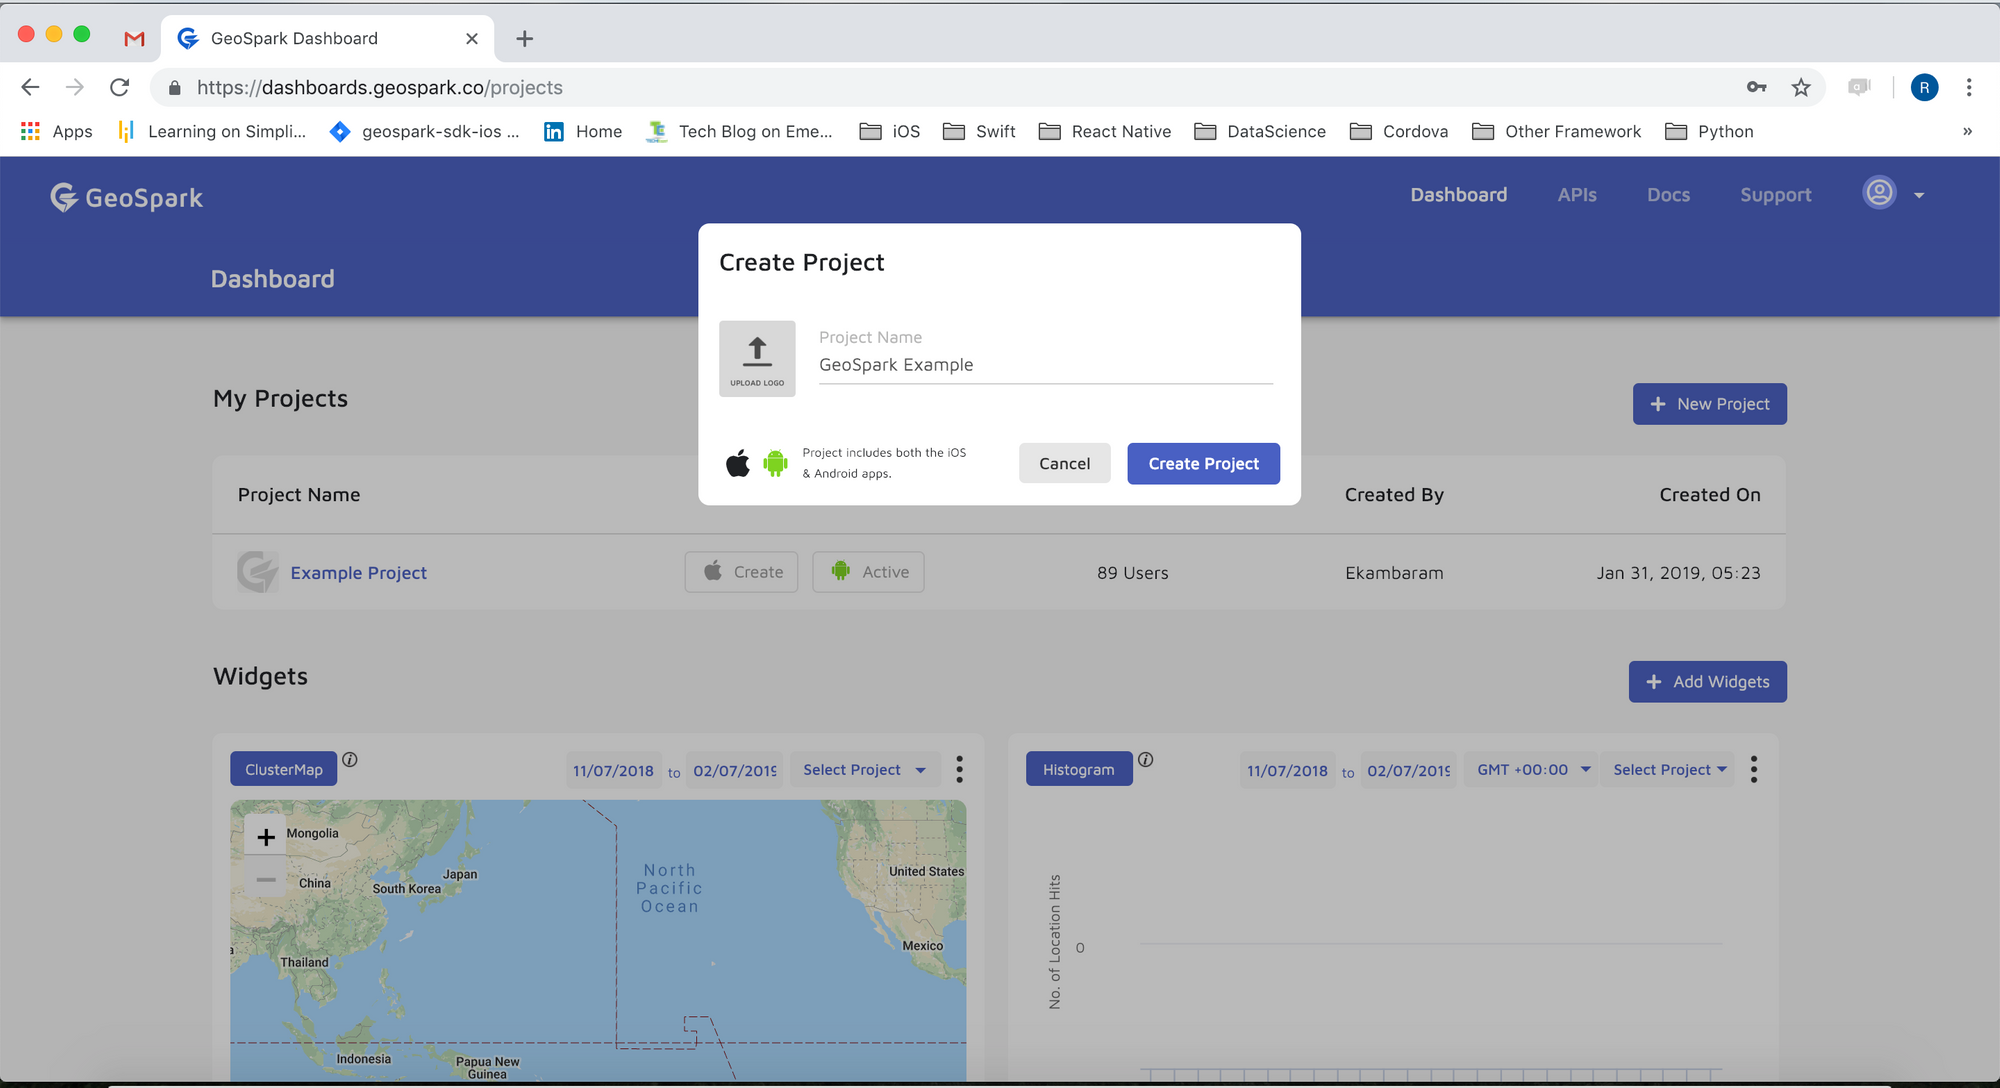
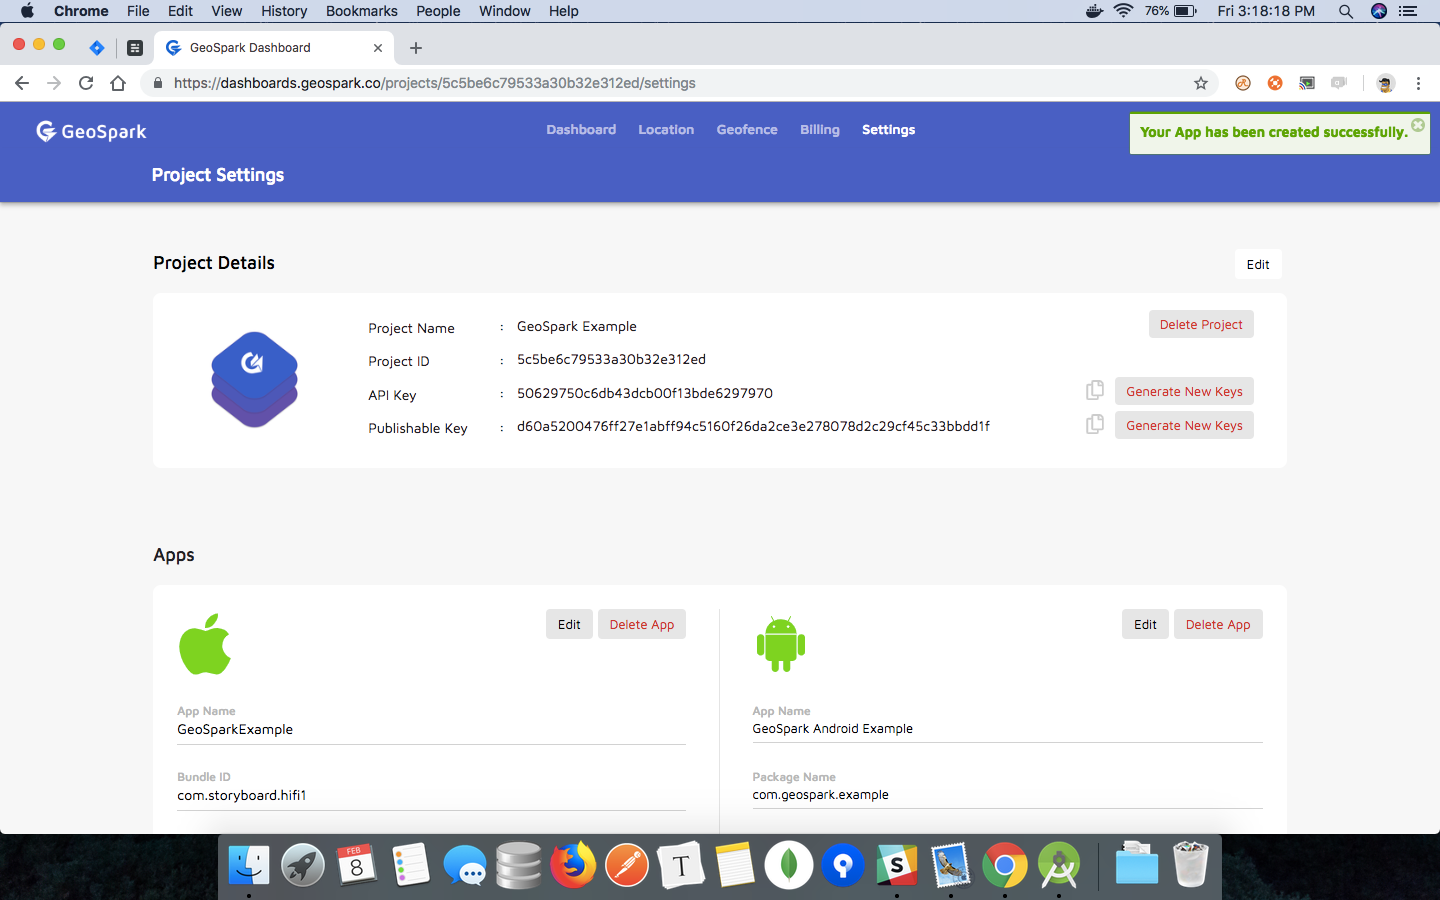
Once you have created your project, you can add App Name, Package Name and create Android applications.
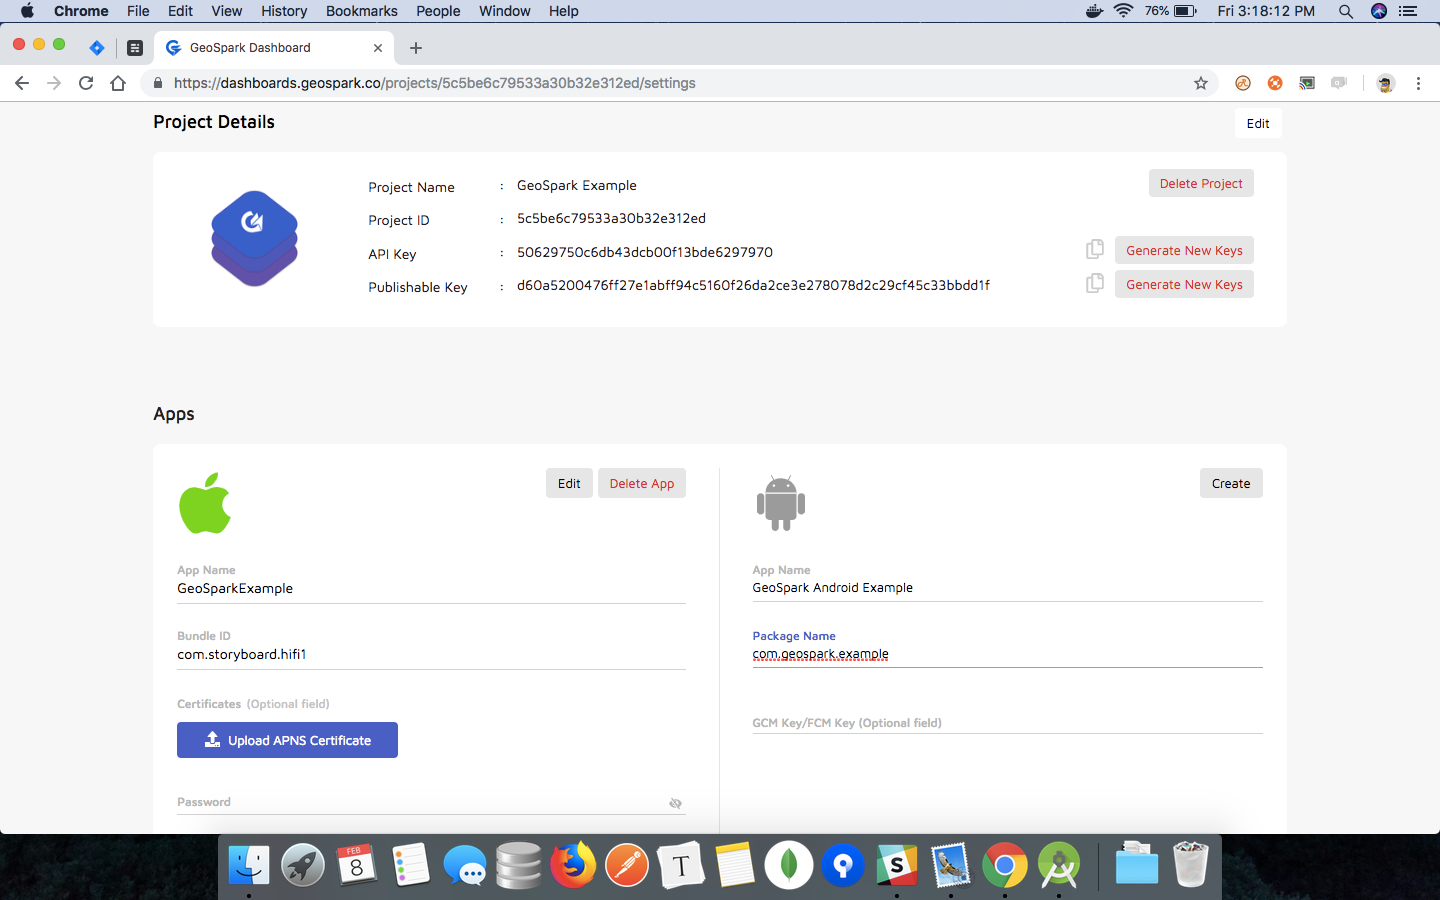
You can get the publishable key from your project settings page which has to be used while integrating the SDK with your application.
In onCreate method of your Application class, Initialize the SDK with your PUBLISH _KEY.
Step 4: Create User
GeoSpark SDK needs a User ID object to identify the device. The SDK has a convenience method createUser() to create a user which returns User ID.
Step 5: Start Location Tracking
To enable location, call the requestPermissions and requestLocationServices method. For Android 6.0 and above, calling this method will trigger a location permission popup that the user has to allow and startTracking the user location.
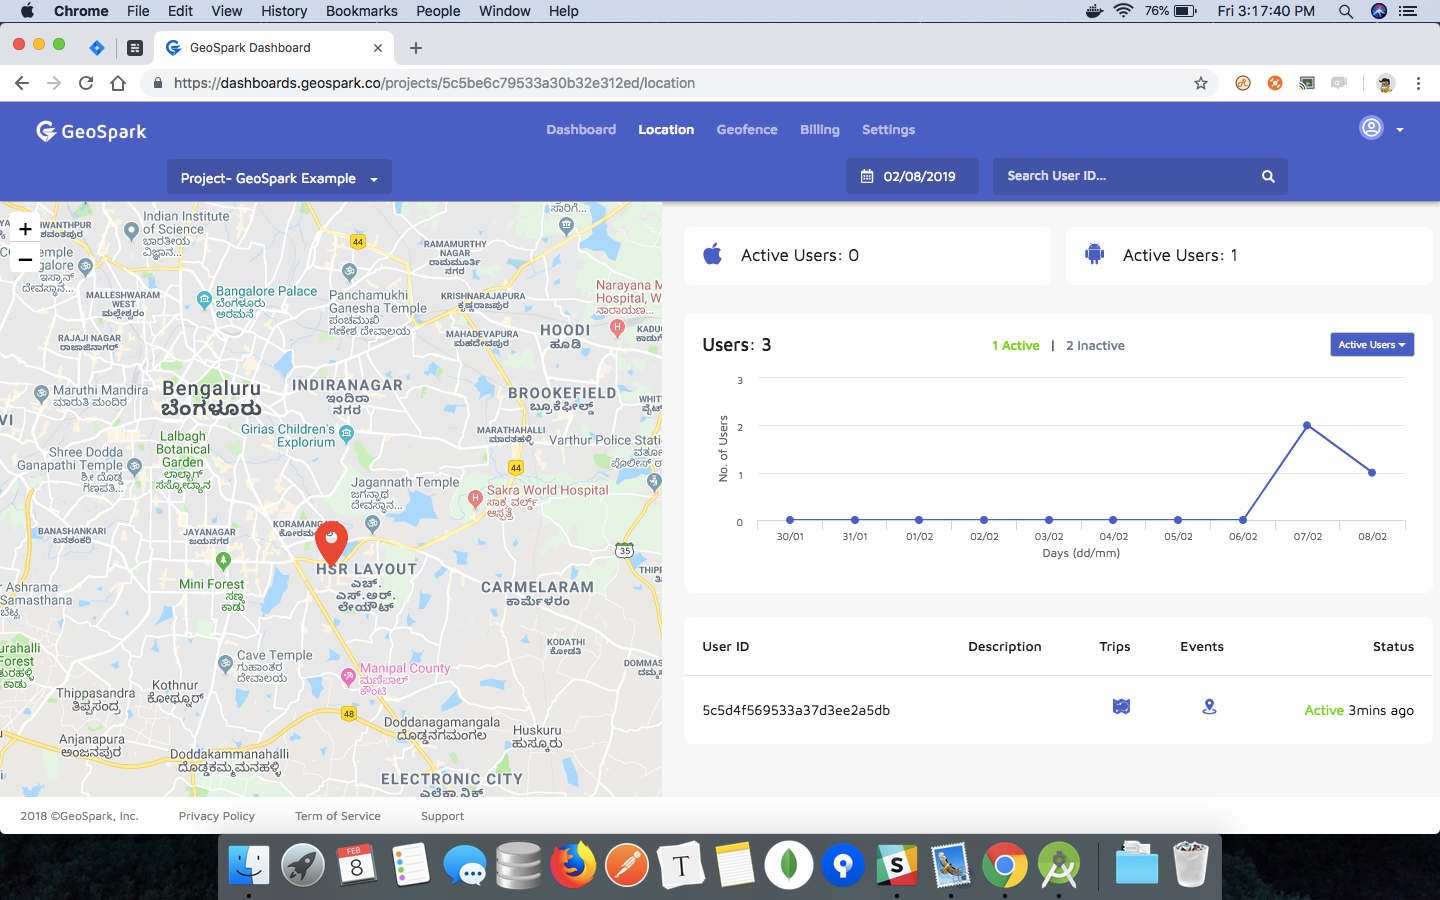
Start viewing your user's location data on the dashboard.
Your Application is successfully integrated with GeoSpark Android SDK.
Ready to take the next steps?
Thank you for reading! If you're interested in seeing our product in action, click here to get in contact with our team. Or, if you're ready to get started, you can sign up here to start using our SDK and APIs today.